Showing posts with label collage. Show all posts

February 12, 2016

PRESIDENTS' DAY art project Part 2:George Washington on the United States Flag {Collaborative Collage Tutorial}


Can I just copy and paste this section from the previous post Presidents' Day art project Part 1?:   wa wa wa

This is an excellent collaborative art project for Presidents' Day! We created Abe Lincoln {Newspaper Abe tutorial here} a few years back, and then added to our collection George Washington & Thomas Jefferson recently. Once again we had about 80+ kids contributing to make each of them. 

This was a fabulous patriotic art project to participate in with the students. They were able to reflect on the history and using words that represent our country.

George Washington on the 
 American Flag

George Washington {Tutorial} on Canvas Material: 

Materials:
overhead projector
president on transparency paper, Here: site for George Washington's image
canvas material to fit your image
canvas stretched or wood board (for the image to adhere and hang on wall)
black, red, & blue permanent markers
red & blue material markers
heavy books
large brush
plastic cling wrap


I used canvas material (can find at a any material store in bulk) instead of paper, for this project because I wanted it resemble the texture of a real flag. I regret I didn't end up with too many photos of this project while working on it with the kids. I had to watch them like a hawk!

1- Please first go to Newspaper Abe {Tutorial} to see all of the steps that I will not be covering.

2- First I projected and traced an image of Pres. Washington and then the United States Flag. I used black permanent marker for Washington and for the flag I used blue & red material markers.

3- Then I cut the blue rectangle with stars out, and the red stripes out of the flag. I didn't want the students to accidentally write on the white part of the flag or use red on the blue part of the flag or vice versa so we kept them in separate stations. (If you were to make this with an older group, you wouldn't need to cut it out. I would bet that they would not cross colors).

4- We wrote with various reds and blues with permanent & material markers to write PATRIOTIC WORDS & ALL 50 STATES.

5- Next I laid out the complete image onto the wood board, then adhered the canvas strips with Mod Podge one by one. I used plastic wrap and books, just like I showed you in the Newspaper Abe Tutorial. Refer to that tutorial if you have any questions on this process.


Hanging out together... drying... 

Abe Lincoln {click here for tutorial}, George Washington, and Thomas Jefferson {click here for tutorial} getting ready to hang side by side on our school wall.


Buddies.


I do NOT SPAM! You won't be sorry when you get the SUPER SECRETE SALES & SNEAK PEEKS!

Thank you for stopping by 

PRESIDENTS' DAY art project Part 1: Thomas Jefferson {Collaborative Collage Tutorial}

This is an excellent collaborative art project for Presidents' Day! We created Abe Lincoln {Newspaper Abe tutorial here} a few years back, and then added to our collection George Washington & Thomas Jefferson recently. We had about 80+ kids contributing to make each of them. 

This was an amazing art project to participate in with the students. They were able to reflect on history and words that represent our country.

We entered the presidents in a contest and won a prize!

We are representing our 2nd Grade 
Madison Country Patriot Contest. 
SMILE!!!! GOOFY ALL OVER THE PAGE!


Thomas Jefferson on the
Declaration of Independence


Tutorial for Jefferson on Paper:

Materials:
overhead projector
president image on transparency paper
numerous copies of The Declaration of Independence
clear tape
canvas  stretched or wood board (for the image to adhere and hang on wall)
black permanent marker
crayons
heavy books
plastic cling wrap
large brush

1- Please refer to the tutorial of Newspaper Abe Here to get an idea of how the images are copied onto the paper and the adhering process.


2- I used this Declaration of Independence and this image of Thomas Jefferson.

3- I lightly taped the paper together on the back side so the tape would not show on the final image.(Notice I did print on different shades of paper, hence the lighter area of the face)

4- I turned over Thomas Jefferson and randomly cut into strips and then into rectangle shapes. I cut around 90 shapes so each student and teacher would be able to color their own. 

5- Just like in creating Abe, I numbered the backside of each paper in order (1-90) so I could easily arrange Thomas back together. 


6- Students created designs and colored with crayons on their shape of paper.


7-  I sparingly taped the backside of shapes into strips, taping the numbers in order.

8- Flipped it over and used Mod Podge to adhere the strips (easier in strips than the whole image) onto the wood board until image was complete!

9- I use polyacrylic, which is a non-yellowing clear layer and is stronger than Mod Podge, for a top coat on the image. 


November 02, 2012

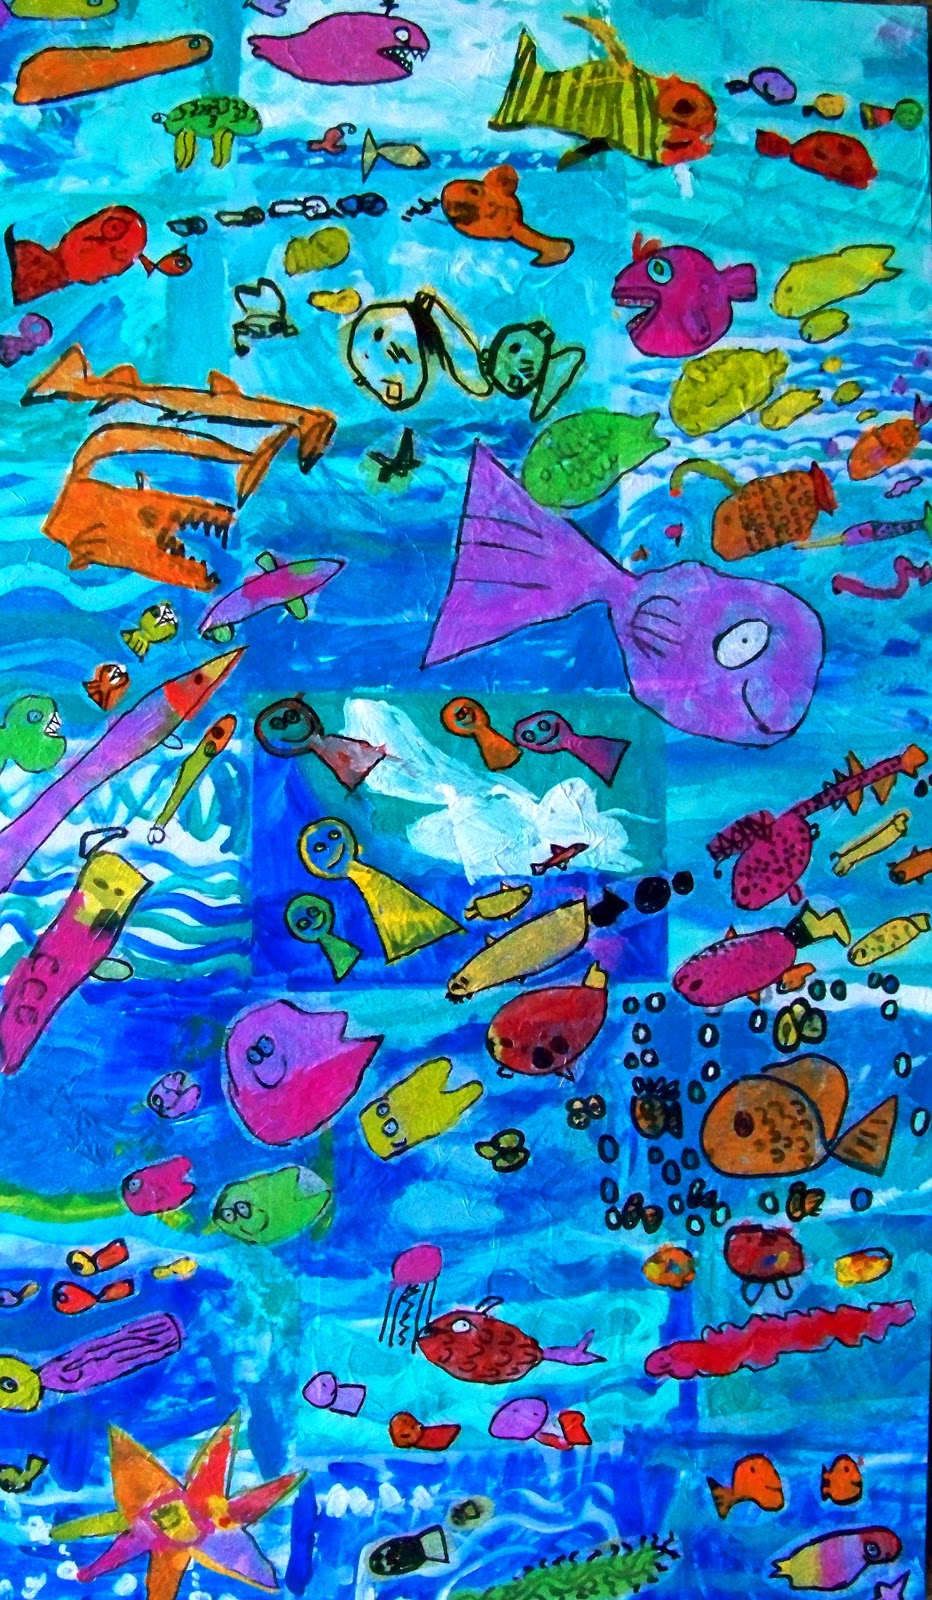
A swarm of Sea Creatures! -tissue paper & paint {tutorial}


This is one of the most beautiful collaborative art projects that the kids have created yet! I absolutely love the way their adorable fish are swimming in the gorgeous blue ocean water...
There were 4 - 1st grade classes, with 80+ kids who collaborated. We used tissue paper & acrylic paint to produce this lovely, colorful artwork that hangs in their hallway. 

There are so many joys I receive & give from volunteering my time to help create art for these kids. One is that 2 of them are my own kids and knowing their excitement and appreciation. Another is seeing all of the kids in each grade so thrilled and proud of their artwork-that they contributed to such amazing artwork hanging in their halls. It does not matter the level of artistic ability or even capability each child has, but that each one has contributed and they are just as awesome as the others! An additional aspect I enjoy about creating art with the kids, is that any of our projects can be made at home in a smaller version.


Here's how we did it {tutorial}:

    Items you will need:
  • white tissue paper
  • various acrylic paint colors
  • black permanent marker
  • Mod Podge (and a brush)
  • 3 canvas or wood panels (white)


  • On a tissue paper I had them draw with pencil, then outline with permanent marker, and then paint their fish. They could fill up their paper with many sea creatures, or a few large ones, whatever they desired.
  • On a separate tissue paper they painted with several hues of blue for ocean water, some with waves, or bubbles or splashes...


  • I spread out the ocean water pieces, darker on the bottom and lighter towards the top. I then Mod Podged the water onto the canvases, overlapping each other a little. I had to work quickly because the tissue paper rips if you wait too long. Dry time is 20 min.
  • Next, I cut out each of their fish and Mod Podged onto the ocean water. I clustered their own fish near each other so they would be able to recognize all of their artwork together.

Just little ol' first-graders...


their imaginations...


and fish...


Look at mine!


Amazing KIDS
Amazing TALENT
Amazing ART


I do NOT SPAM! You won't be sorry when you get the SUPER SECRETE SALES & SNEAK PEEKS!

Thank you for stopping by 


February 29, 2012

Life-size body art! - tissue paper collage with kids

This was a kid request for our art class project. I love this clean, body art concept! The kids get to experiment with their cutting, glueing, & tracing skills (oh, and "stay still" skill). 

All you need is:
A Body
A Large Paper
A Tracing Device 
Colorful Tissue Paper
Glue
Scissors

(ages 3 -6 years old)


Positioning bodies... tracing body outlines...


...cutting, glueing, collaging...


...and here are our brightly colored bodies!