Showing posts with label Halloween decoration. Show all posts

October 14, 2013

I love PUMPKINS

I absolutely love pumpkins - the color, shape, nostalgia, Halloween decor, and of course the many pumpkins desserts I can make or eat! Yummy. Our kids like to place them all over our porch during Halloween and Harvest time.

I'm going to be terribly honest and divulge that sadly, our garden this year  was almost completely unprofitable (frowny face). It was our first garden in Idaho since we moved from Oregon. Clearly I do not have a green thumb. 

Luckily, we were able to drive nearby to the Sutton family farm and buy their pumpkins. Yay! They are gifted gardeners and have many varieties of everything! Here are just a few of my favorite "Pumpkin Pretties" scattered throughout their lovely farm. Compliments of S. Sutton herself- she has a lovely eye for mixing natural objects and antique together.

Walk around, enjoy their farm as we did...


love the pumpkin-head scarecrow


October 08, 2013

Halloween "Sushi Roll" Garland {felt tutorial}

H A L L O W E E N . I S . H E R E !


I try to celebrate and decorate for Halloween in a "non-creepy" style for my kids- and for myself. We tend to make a few art projects & crafts each year to add to our Halloween decor. Lately I have a fetish with tissue paper and felt. Have you noticed? I spotted this lovely felt roll idea on the cover of Green Crafts for Children by Emma Hardy  and decided to make a Halloween garland instead. 

We made a birthday garland as a family (picture at the bottom of this post) and it only took an hour. This is the one of the easiest garlands you can make. You could make felt roll necklaces or bracelets too. I've seen a few wreaths covered in beautiful felt rolls for many occasions- These felt "sushi roll" projects are endless! 


Here is how I made this felt. Halloween. sushi roll. decor.

{sushi roll TUTORIAL}

Items needed:

  • material scissors
  • long needle 
  • 3 yards of yarn (or bakers string would be lovely!)
  • 10 - 8" x 11" black felt sheets
  • 5 - 8" x 11" white felt sheets
  • 5 - 8" x 11" orange felt sheets


  •  Cut felt sheets into 1 to 2-inch wide strips. (However wide you like) Cut the short length of sheet- 8 inches across.


  •  Layer 3 black strips and 3 orange strips and roll up. There will be excess.


  •  Cut off excess. ( I keep the excess for other fun art or sewing projects.)


  •  Make sure the needle and yarn goes through the middle of "sushi roll" so the roll won't slosh around.


  •  Repeat with alternate color. So easy right?


I wanted to hang my Halloween sushi garland across my front window outside, but my son (8 yrs)  "advised" me that it would get dirty. So it's inside on the wall. Wouldn't it be great outside though?


Another colorful garland we made as a family for birthdays and year-round kid corner decor. Now you know why I call them SUSHI ROLLS- look-a-likes! 

I think I'm going to make one for Christmas, hmmmmm...


October 26, 2012

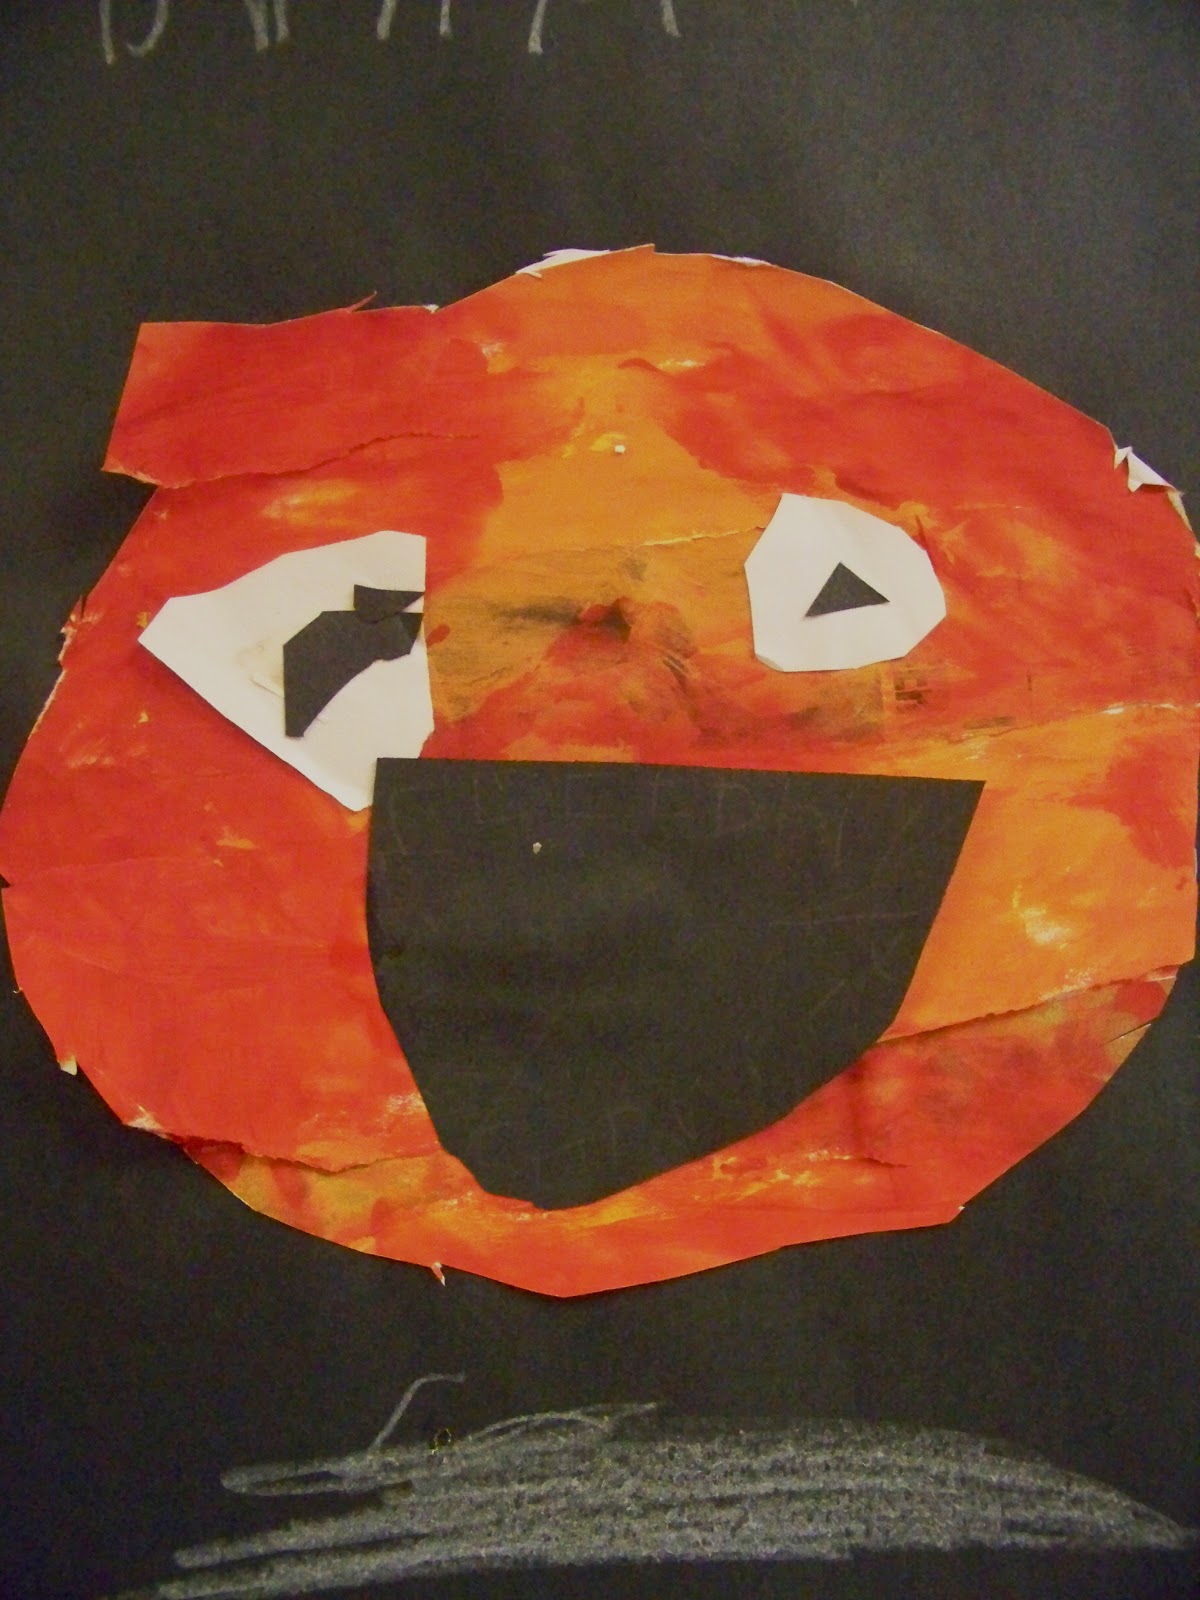
Goofy Mixed Media Halloween Pumpkins! {tutorial}

We did this kid art project in my son's 1st grade class last week! These 1st-graders did amazing on their pumpkins ripping, glueing, mixing paint with their fingers, cutting, and creating faces- all in a little over 1 hour! 

This is the best art project to do with kids to help continue & develop multiple skills.  See how easy it was to create really silly pumpkin faces.(I found this idea from pinterest and that artist woman.)


Materials Needed:

  • various papers that can rip in strips (we used newspaper, wall paper, tissue paper & white paper)
  • black, green, white & black paper
  • red & yellow paint
  • paper plates for mixing
  • scissors
  • glue


  • have the kids RIP their own various papers in strips, then vertically GLUE securely to white paper -strips can be right next to each other or have spacing


  • give each their own plate of RED and YELLOW  paint to mix with their fingers - Yes, I said finger mixing! 
  • with their fingers have them apply their orange paint to their entire paper


  • let the paint DRY and then on the back of the painted paper have them draw a PUMPKIN shape and CUT it out


  • pre-cut paper for the EYES, MOUTH, TEETH, PUPILS, NOSE, & STEM so they can design and cut out their faces quickly...
Ready to make a FACE!


teeth...grrrrrrrrrrr...


  • glue all the face parts on and glue the pumpkin to a black paper


These are hilarious & quirky! I laughed again when I saw them hanging up in the hallway together!


 I love the different colors of oranges that the kids created all by themselves. The eyes and mouth add the finishing touch of goofiness!


Don't you love these?


HAPPY PUMPKIN DAY NEXT WEEK!


A little Halloween at our house - bats-spiders-eyeballs

The month of October... has been busy! If you look at my blog, it looks as if nothing has been happening in my life altogether. But if there is not much posted here, that means waaaaaaaahey too much has been happening (not to mention, I have the slowest high speed internet)! 

My kids begged to decorate for Halloween, and here are just a few of their favorites and mine...


-BATS-
(white crayon on black paper - 7 years old)


-FEATHER WREATH with BATS-
(I loved the feather wreath in our craft store, but didn't want to pay $40-so I hot-glued a feather boa onto a black foam wreath.)


 -KIDDIE SPIDERS-
The main bodies are made from painted egg cartons, legs from pipe cleaners, and open-mouthed photos of my kids. Eeeek!


-EYEBALL WREATH-
I couldn't resist making this wreath that I found at Country Living. I tried not to make it too scary, I have little ones.)


-BoOYA! PUMPKINS-
I love this idea of white pumpkins with a message that has been floating around on pinterest.com, but of course I changed the message to my liking.


Have a...

H A P  P  Y   H A L O W E E N !


It's obvious, my kids enjoy painting on our windows whenever possible - which is okay with me!